React Error: Attempted import error ‘X’ is not exported from

This error occurs when you try to import something that is not present in the specified file. When solving this error, check to make sure you are using the corresponding import and export mechanisms.

Default exports

Default exports are useful to export only a single object, function, variable. You can have only one default export per file.  

How to make a default export:

export default function Component() {
   return <h1>Hello, world</h1>
}

How to import a component with a default export:

import Component from './Component';

Notice that you do not use curly braces when importing a default export.

When importing a default export, you can use any name you want since there is only one in the file. For example:

import MyNewName from './Component';

Named import

You can have more than one named exports per file.

How to make a named export:

export function add(a, b) {
    return a + b;
}

export function subtract(a, b) {
    return a - b;
}

How to export multiple named modules at once:

export {
   add,
   subtract,
}

How to import a named export:

import { add, subtract } from './another-file';

When using named imports, the name of imported module must be the same as the name of the exported module.

You can also import both a default module and a named module on the same line, like so:

import Component, { add } from './another-file';

Testing Event Handlers in React Testing

In this short article, you will learn how to test event handlers, such as button clicks, with React Testing.

First, we will create a simple component to test:

import React from "react";

export default function ButtonWrapper({ title, ...props }) {
  return <button {...props}>{title}</button>;
}

This ButtonWrapper component takes in a title prop and any other props and returns a standard JSX button element.

Now, create a testing file with the same name as the component file and a .test.js extension (or .test.tsx if you are using TypeScript) (i.e. ButtonWrapper.test.js)

First, import the following from React testing and import the component:

import React from "react";
import { render, screen, fireEvent } from "@testing-library/react";
import ButtonWrapper from "./ButtonWrapper";

Now, create the test and give it a name (i.e. "handles onClick")

test("handles onClick", () => {
 
})

Render the ButtonWrapper component:

render(<ButtonWrapper title={"Add"} />);

We will add an onClick property to the button and call the jest.fn() function whenever the component is clicked:

const onClick = jest.fn();
render(<ButtonWrapper onClick={onClick} title={"Add"} />);

jest.fn() is a function created by Jest which tracks how often it is called. In other words, it will keep track of how many times the button component is clicked.

Now, we will get access to the button and click it using fireEvent.click():

const buttonElement = screen.getByText("Add");
fireEvent.click(buttonElement);

fireEvent.click() simulates a click on the button element.

Next, we will write an assertion for how many times the button has been clicked. First, we will write an inaccurate assertion:

expect(onClick).toHaveBeenCalledTimes(0);

Now, we will run our test:

yarn test

This test will not pass because we know that the button was clicked once by the fireEvent call. The output should look like this:

Basically, React Testing is saying that it expected 0 calls to be made, but it received 1 call.

Now, let’s make a correct assertion:

expect(onClick).toHaveBeenCalledTimes(1);

The output should look like this:

Here is the final code:

import React from "react";
import { render, screen, fireEvent } from "@testing-library/react";
import ButtonWrapper from "./ButtonWrapper";

test("handles onClick", () => {
  const onClick = jest.fn();
  render(<ButtonWrapper onClick={onClick} title={"Add"} />);
  const buttonElement = screen.getByText("Add");
  fireEvent.click(buttonElement);
  expect(onClick).toHaveBeenCalledTimes(1);
});

Now, you can test event handlers in React Testing. Thanks for reading!

How to Divide an Array in Half in JavaScript

In this tutorial, I will show you how to divide a JavaScript array into two equal parts (or almost equal if the array has an odd length).

Use the Array instance slice() method:

const test_array = ["a", "b", "c", "d", "e", "f"];

const half = Math.ceil(list.length / 2); 

const firstHalf = list.slice(0, half)
const secondHalf = list.slice(-half)

If the list contains an even number of items, the result is split with exactly half the items:

>>> firstHalf
["a", "b", "c"]
>>> secondHalf
["d", "e", "f"]

The Math.ceil() function always rounds a number up to the next largest integer. We add this in case the array length is odd and list.length / 2 is not a whole number.

If the array contains an odd number of elements, the result is split as close to half as possible.

const odd_array = [1, 2, 3, 4, 5]
const half = Math.ceil(list.length / 2); 
const firstHalf = list.slice(0, half)
const secondHalf = list.slice(-half)

Since there are 5 elements, the half variable will be Math.ceil(5 / 2) = 3. So, the array will split on the third element.

>>> firstHalf
[1, 2, 3]
>>> secondHalf
[4, 5]

Make a Face with D3.js and SVG

This tutorial is a good introduction to using D3.js with SVG. It will cover selecting DOM elements with D3, creating DOM elements with D3, customizing them, and more.

At the end of the tutorial, you will have created a smiley face that looks like this:

Loading D3.js

Load D3.js from CDN by adding the following script tag to the header of your index.html file:

https://d3js.org/d3.v5.min.js 

Now, you can check to make sure that D3 was successfully added to your project by simply typing “d3” in the console while running your html file. It should output the d3 object, which looks like this:

Now, we can use D3 to manipulate the DOM by using the d3 object in our JavaScript code. Here’s an example:

d3.select('div');

Creating a face using SVG and D3

Make an SVG in your index.html file:

<svg width="500" height="250"></svg>

In your app.js file, get access to the SVG element you just created using d3:

const svg = d3.select('svg');

Creating the Head

Now, add a circle to the SVG:

const circle = svg.append('circle');

Now, we will give the circle a radius and (x, y) position for its center. We will use D3 method chaining:

circle 
    .attr('r', 250 / 2)   // radius
    .attr('cx', 500 / 2)  // center x
    .attr('cy', 250 / 2); // center y

I set the radius and center-y values to be half of the height of the SVG and the center-x to be half of the width.

Instead of hard-coding the values in, we can create variables for these width and height values in our JavaScript. To access the width and height values from the SVG in our index.html file, we can use svg.attr(). If you call svg.attr() without a second attribute, it returns the value of the attribute that you specify:

const width = svg.attr('width')

SVG attributes are strings by default, so we can parse the value into a float using parseFloat:

const width = parseFloat(svg.attr('width'));

You can also use the unary operator to parse into a float:

const height = +svg.attr('height');

Now, we can use the variables instead of hard-coded values to define our SVG elements:

circle 
    .attr('r', height / 2)   
    .attr('cx', width / 2)
    .attr('cy', height / 2); 

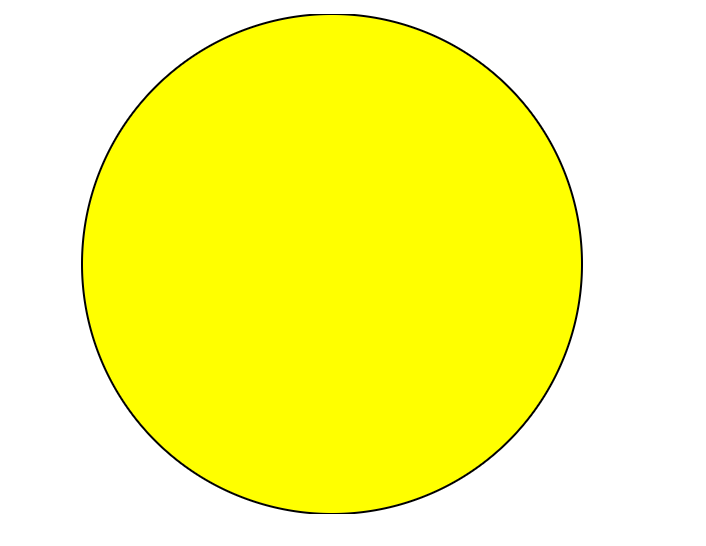
We can also add fill and stroke attributes to give the circle a fill color and outline color:

const circle = svg.append('circle') 
    .attr('r', height / 2)    
    .attr('cx', width / 2)  
    .attr('cy', height / 2)
    .attr('fill', 'yellow')
    .attr('stroke', 'black')

Now, we have the circle for the head:

Creating the Eyes and Mouth

We will make the eyes using circles, similar to how we made the head:

const leftEye = svg.append('circle')
    .attr('r', 10)    
    .attr('cx', width / 2 - 40)     
    .attr('cy', height / 2 - 40)
    .attr('fill', 'black')

const rightEye = svg.append('circle')
    .attr('r', 10)    
    .attr('cx', width / 2 + 40)     
    .attr('cy', height / 2 - 40)
    .attr('fill', 'black')

As you can see, we are defining the leftEye and rightEye variables in the same line in which we are method chaining the attributes.

For the mouth, we will create a group element and add a transform property to the group element to translate it to the center of the face:

const g = svg.append('g')    
    .attr('transform', `translate(${width / 2}, ${height / 2})`);

Then, we will use a d3.arc:

const mouth = g.append('path')
    .attr('d', d3.arc()({     
        innerRadius: 40,
        outerRadius: 50, 
        startAngle: Math.PI / 2, 
        endAngle: Math.PI * 3/2
    }))

Group Elements

Instead of constantly repeating width / 2 and height / 2 to move elements to the center, we can put everything in the group element so that we can leverage that fact that it’s translated by (width/2) and (height/2).

This update doesn’t change the look or functionality, but it just makes our code a little bit cleaner.

First, move the group element to the top of the screen, under the width and height variable declarations.

Then, append the face, eye and mouth elements to the group element instead of to the svg element directly.

const circle = g.append('circle') 

Now, we can remove the cx and cy attributes from the face because it is put in the center by default because its parent, g, is translated into the center:

const circle = g.append('circle') 
    .attr('r', height / 2)    
    .attr('fill', 'yellow')
    .attr('stroke', 'black')

We can also update the eyes:

const leftEye = g.append('circle')
    .attr('r', 10)    
    .attr('cx', -40)     
    .attr('cy', -40)
    .attr('fill', 'black')

const rightEye = g.append('circle')
    .attr('r', 10)    
    .attr('cx', 40)     
    .attr('cy', -40)
    .attr('fill', 'black')

Final Code

The final code is at https://github.com/jbowen4/d3-smiley-face.

The final code in index.html:

<!DOCTYPE html>
<html lang="en">
  <head>
    <meta charset="UTF-8">
    <meta http-equiv="X-UA-Compatible" content="IE=edge">
    <meta name="viewport" content="width=device-width, initial-scale=1.0">
    <script src="https://d3js.org/d3.v5.min.js" defer></script> 
    <script src="app.js" defer></script>
    <title>Let's Make a Face </title>
  </head>
  <body>
    <svg width="500" height="250"></svg>
  </body>
</html>

The final code in app.js:

const svg = d3.select('svg');

const width = parseFloat(svg.attr('width')); 
const height = +svg.attr('height'); 

const g = svg.append('g')  
    .attr('transform', `translate(${width / 2}, ${height / 2})`);

const circle = g.append('circle') 
    .attr('r', height / 2)    
    .attr('fill', 'yellow')
    .attr('stroke', 'black')

const leftEye = g.append('circle')
    .attr('r', 15)    
    .attr('cx', -50)     
    .attr('cy', -40)
    .attr('fill', 'black')

const rightEye = g.append('circle')
    .attr('r', 15)    
    .attr('cx', 50)     
    .attr('cy', -40)
    .attr('fill', 'black')

const mouth = g.append('path')
    .attr('d', d3.arc()({     
        innerRadius: 70,
        outerRadius: 80, 
        startAngle: Math.PI / 2, 
        endAngle: Math.PI * 3/2
    }))

Complete Guide to JavaScript ES6 Destructuring

Destructuring assignment is a JavaScript technique in which you take the values from an array or the properties from an object and assign them to local variables.

Using destructuring allows you to write code that is cleaner, more concise, and more readable.

We will first look at destructuring rules for arrays then for objects.

Arrays

Let’s say we have an array of emojis:

const emojis = ['🐶', '🐱', '🐭'];

We want to pull out the values and assign them to local variables. We have two options of doing this:

 Option 1: One-by-One

const dog = emojis[0]; 
const cat = emojis[1];
const mouse = emojis[2];

By using destructuring assignment, you can accomplish the same thing with just one simple line.

 Option 2: Destructuring

const [dog, cat, mouse] = emojis;

Syntax for Destructuring an Array

Follow the const with a set of brackets []. Inside the brackets, you can assign a variable name for each index in the array. The variable’s value will coincide with the index at which it matches in the array.

Omit values from destructuring

If there is an array value that you don’t want to assign to a variable, you can omit it from the destructuring by adding a comma without a variable name to skip that index. In the example below, we are omitting cat:

const [dog, , mouse] = emojis;

Put remaining values in separate array

If you only want to name the first couple values and accumulate the rest into a smaller array, use the spread syntax (...)

In the example below, we are creating a variable for the first element then putting the rest in a shortened array:

const [dog, ...rest] = emojis;
console.log(rest) // outputs ['🐱', '🐭']

Provide a default value

You can set a default value for the element at an index in case the value in the array is undefined. Think of it like a “fallback” value.

const emojis = [undefined, '🐱', '🐭'];
const [dog = '🐕', cat, mouse] = emojis;
console.log(dog) // outputs '🐕'

Objects

Let’s say we have an object describing a person:

const person = {
name: 'Alex',
age: 23,
inSchool: true
}

We want to pull out the properties of the object and assign them to local variables. We have two options of doing this:

 Option 1: One-by-One

const name = person.name;
const age = person.age;
const inSchool = person.inSchool;

 Option 2: Destructuring

const { name, age, inSchool } = person;

Syntax for Destructuring an Object

Follow the const with a set of braces {}. Inside the braces, put the names of object properties that you want.

The variable names in the destructured object (on the left of the equals) must match the property names exactly.

Use custom variable name for property

To use a different name for the variable than what’s provided on the object itself, put the property name then a colon followed by the new variable name.

const { name: personName, age, inSchool } = person;
console.log(personName) // outputs 'Alex'

Defining a new name is useful when dealing with name collisions or when destructuring with JSON objects whose property names are not valid variable names because they’re strings.

Nested property destructuring

You can also access the properties of objects within objects through destructuring.

const people = {
   person = {
      name = 'Bob'
   }
}

const { person: { name } } = people;
console.log(name) // outputs 'Bob'

Provide a default value

You can provide a default value for a property in case the object does not have that property.

Since the person object we defined above doesn’t have a job property, it will be set to the default value ( ‘Unemployed’):

const { name, age, inSchool, job = 'Unemployed' } = person;

Challenge

We have an array of dogs:

const dogs = [
{ name: "Sally", age: 6, children: { name: "Blue", age: 1 }},
{ name: "Fido", age: 4 },
{ name: "Sissy", age: 3},
]

How would you use destructuring to assign a variable for Sally’s child’s name with just two lines?


Answer:

const [sallyInfo,] = dogs;
const { children: { blueName } } = sallyInfo;
console.log(blueName)   // outputs 'Blue'

I hope you enjoyed this lesson. Thanks for reading! Comment any questions.

JavaScript ES6 Arrow Functions

Arrow functions are just a shorter way of writing a JavaScript function.

This is an example of using a square function within the JS map function to easily loop through a list of numbers.

var numbers = [1, 2, 3, 4, 5];

const newNumbers = numbers.map(function square(x) {
   return x * x;
});

We can remove the word “square” from our function. Now, the function within the map function is an anonymous function.

var numbers = [1, 2, 3, 4, 5];

const newNumbers = numbers.map(function(x) {
   return x * x;
});

We can make this even simpler by turning the anonymous function into an arrow function.

var numbers = [1, 2, 3, 4, 5];

const newNumbers = numbers.map(x => x * x);

The first x is the parameter; the x * x is an expression. Since the contents of the function are only 1 line, we can remove the return keyword and the curly braces. We can also remove the parentheses from around the parameter since there is only 1 parameter.

Here are some more arrow function examples.

const newNumbers = numbers.map((x, y) => x * y);
const newNumbers = numbers.map(x => {
   return x * x;
});