MySQL is a relational database management system. It is one of the most popular RDMS’s out there today.
It is open-source, but it’s also backed by Oracle so you can use it without any commercial license or you can purchase premium services & support from Oracle
Installing MySQL on macOS
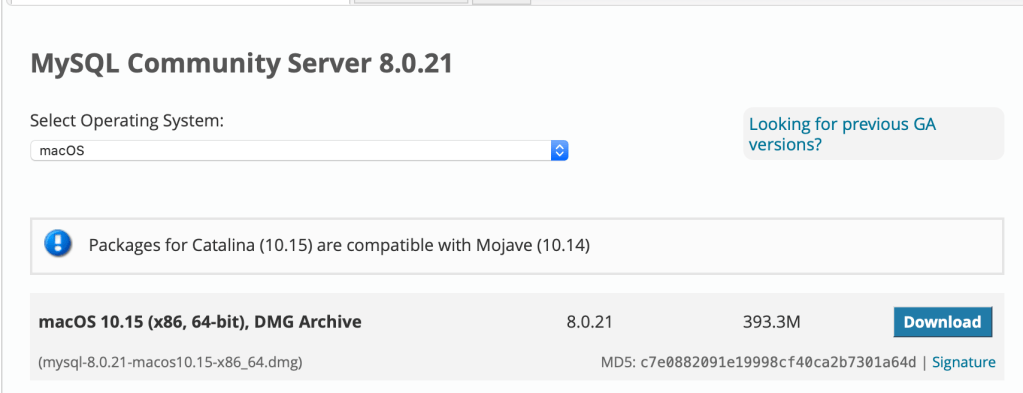
Go to this link. You should see a page with the title MySQL Community Server. Choose whichever version you want to download; you can just download the first version in the list if you’re not sure.
Open the .dmg Installer and go through the setup screens in the modal popup. When it asks for a password for your root, choose a fairly robust password and write it down somewhere because you’ll be using it in any MySQL applications.
To check if the installation was successful, go to your computer’s System Preferences and if you see the MySQL icon in one of the rows, your installation was successful.
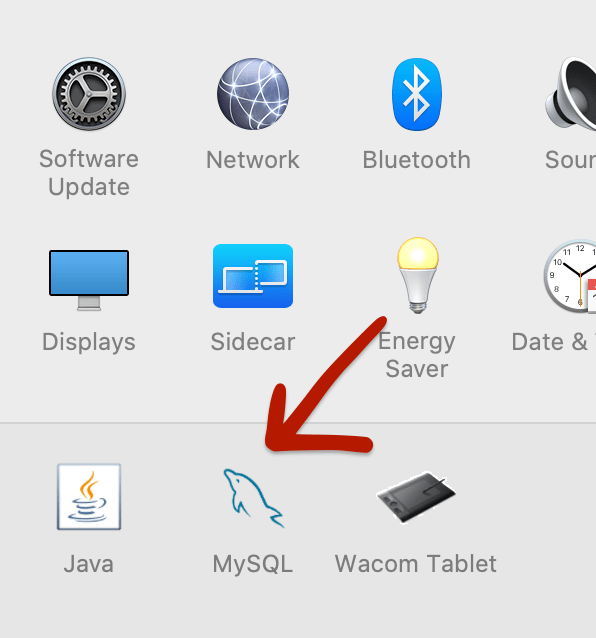
Double click the MySQL icon to open a modal window in which you can start or stop your MySQL Server.
Installing MySQL Workbench
MySQL Workbench is a GUI tool that lets you manage your MySQL databases much more simply.
Go to this link and select MySQL Workbench from the list of Community Downloads.
There will only be one Installer option so press Download, then choose “No thanks, just start my download” and the download will start.
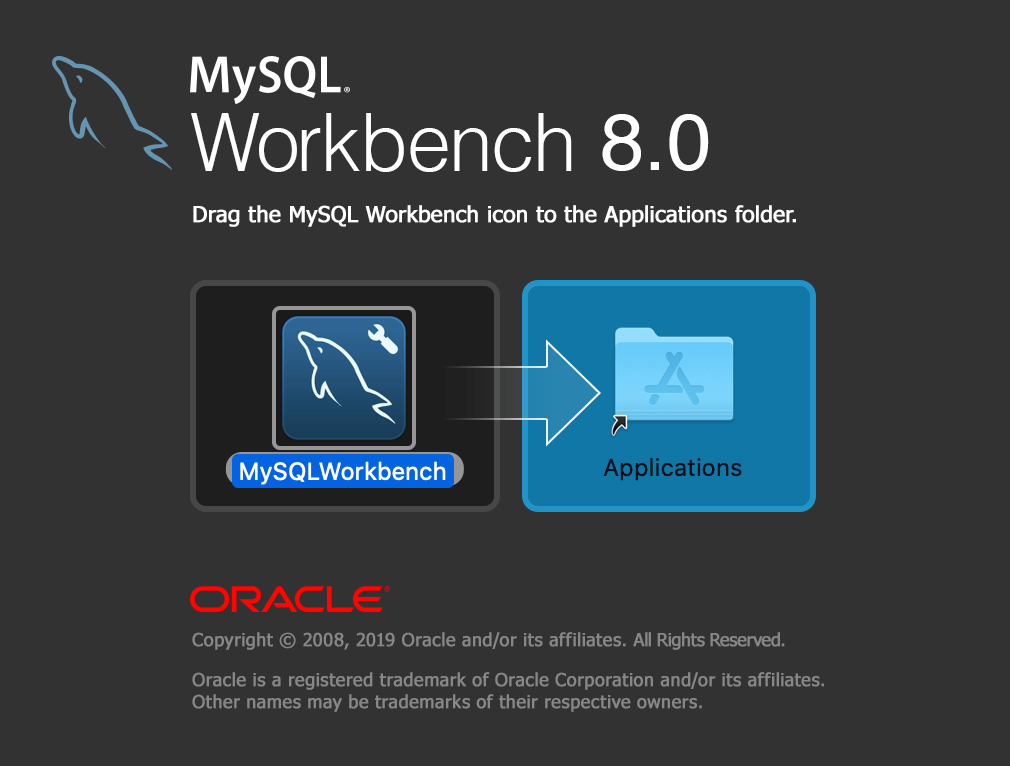
Open the .dmg Installer and drag MySQL workbench into the Applications folder. That’s it, you’ve set it up!
When you open MySQL Workbench, you may see this message (“MySQL Workbench could not detect any MySQL server running. This means that MySQL is not installed or is not running”).
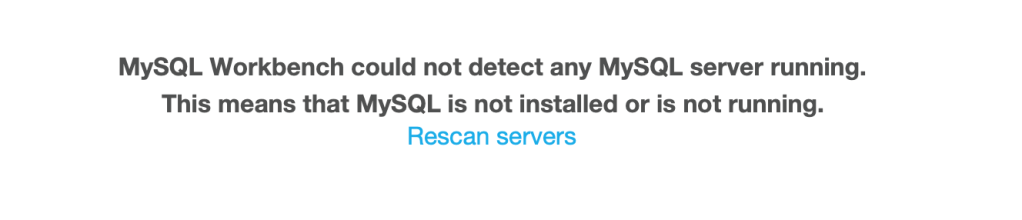
Since we know we installed MySQL earlier, this unwanted message is displaying because MySQL server is not running on our computer.
To start the server on your computer, go to your computer’s System Preferences, double click the MySQL icon, and you should see this page.
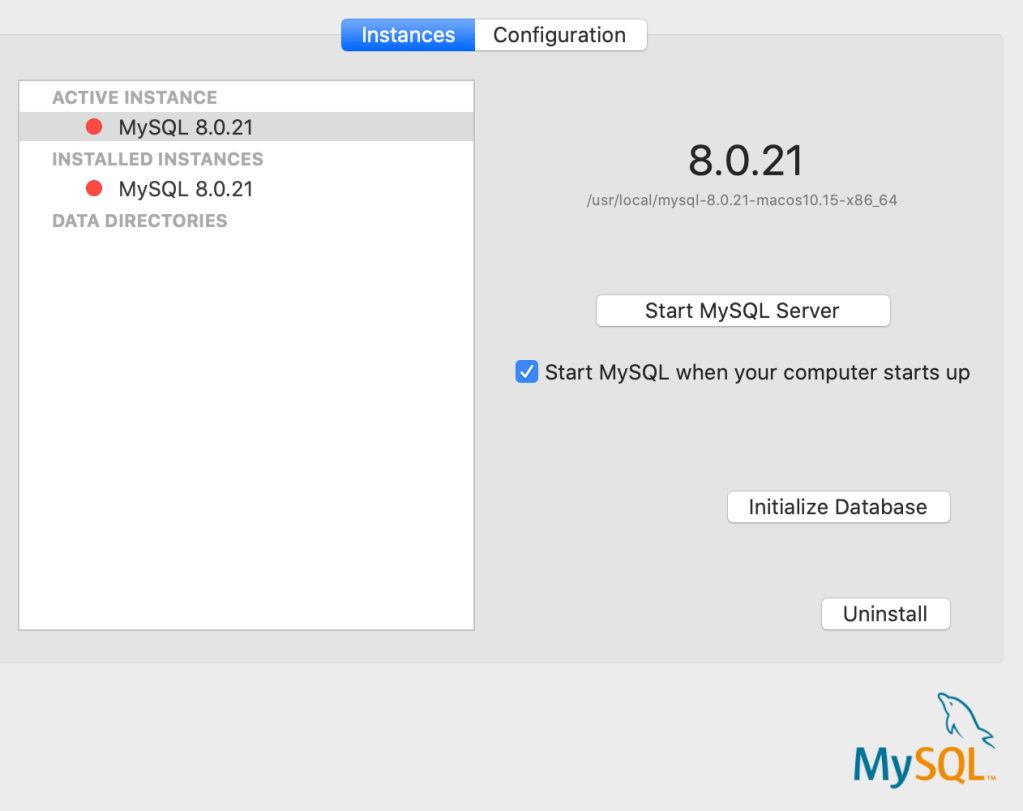
Press “Start MySQL Server” to start your server. Close MySQL Workbench and reopen the application. Now, you should see:
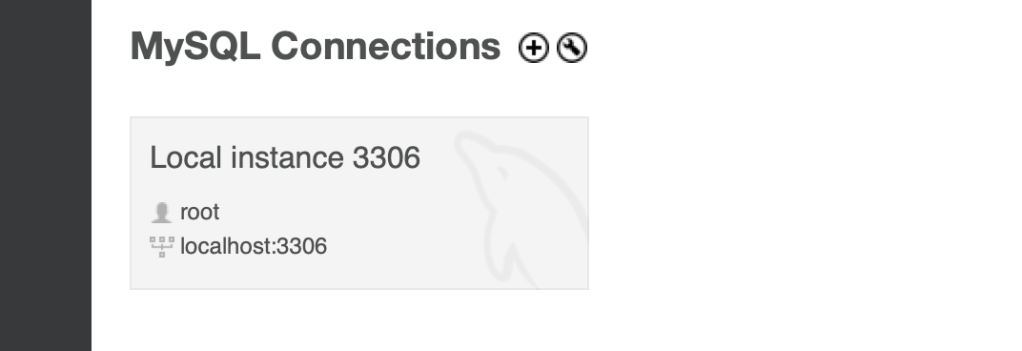
This is what we want to see. Press on this button. *If you press it and you get an error, delete the connection and create a new one.
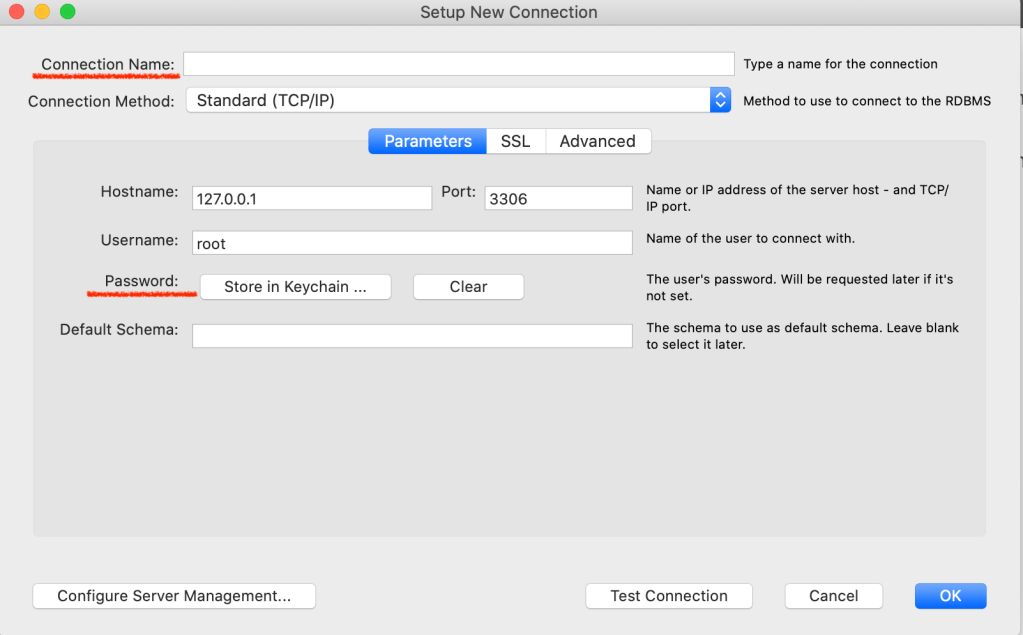
How to Create a New Connection
Press the “+” button.

Fill in the Connection Name (any name you want) and Password (the password we created earlier during the MySQL installation). Then, test the connection using the Test Connection button at the bottom. If the connection is successful, press OK.
When you press on the Local Connection now, it should work.
