Web scraping is the process of automatically extracting data from a website.
You will need an understanding of basic HTML page structure in order to grasp this tutorial. Web scraping with BeautifulSoup to get data/text from a page is done by referencing specific HTML semantic tags, classes, and ids on that page and getting the data from within them. You will better understand what I mean as we continue.
BeautifulSoup is the Python package we are going to use to do the web scraping. Requests is a package that allows you to send HTTP/1.1 requests extremely easily.
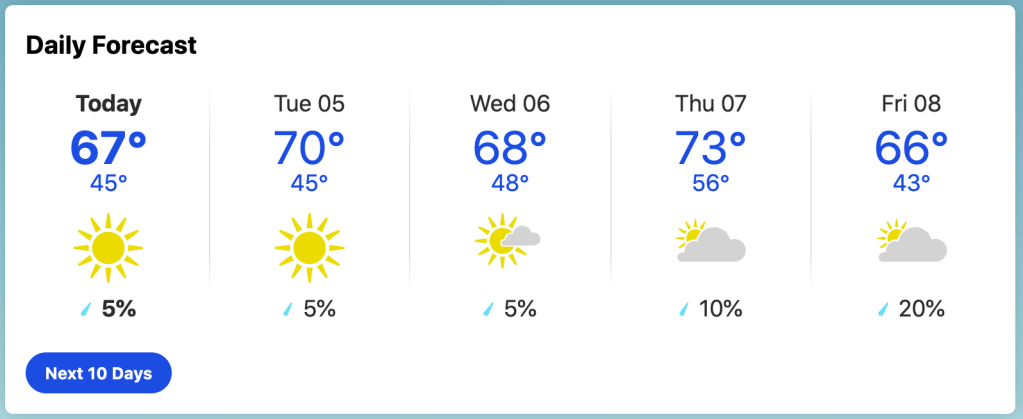
In this tutorial, we are going to be parsing the information from the daily forecast element on the Orlando, FL weather page on weather.com (this is the link). We will transfer the information to a structured, table format using Pandas.
The picture below shows the div element which holds the daily forecast information for the week. When you view this tutorial, the numbers will probably not be the same but, other than that, you should see something that looks like this. This is the element we are going to be scraping.
In Terminal, create a new folder with mkdir, cd into the folder, and create a .py file. I will call mine scraper.py. This file will contain the code for the scraper.
In the next lines, we are installing some necessary dependencies using pip, the Python package manager, into our project folder.
mkdir project-folder
cd project-folder
touch scraper.py
pip install beautifulsoup4
pip install requests
pip install pandas
Open up the scraper.py file in a Code Editor.
First, we will add the import statements to our file for the packages we just installed using pip:
from bs4 import BeautifulSoup
import requests
Ok, let’s start writing the code. First, write the following line:
page = requests.get('https://weather.com/weather/today/l/9ca5fcd4263a24d4d3aaea0c6ab0aea6bea876cfce908ee624588a8f269f6fa1')
This line uses the request package to get the HTML page of the URL in quotes. In this case, we are using a page on the site.
Next, write this line:
soup = BeautifulSoup(page.content, 'html.parser')
This line initializes BeautifulSoup in our project. Now, we can use the soup variable to access the functions within the BeautifulSoup package. The first parameter in the statement is what you want to scrape (in this case, the content of the page we got earlier) and the second parameter just tells BeautifulSoup that it will be parsing HTML.
Now, if you are using Google Chrome, you can Inspect the page and find the id of the div element which holds the data you want to scrape.
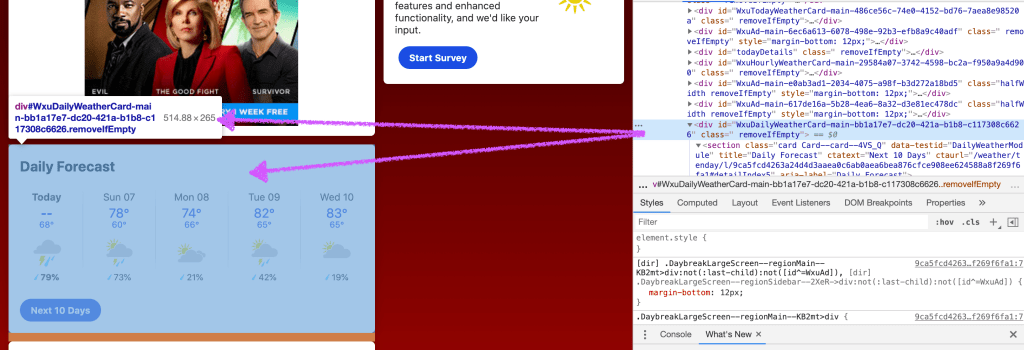
As you can see from the above image, I found that the div containing the Daily Forecast information had an id of “WxuDailyWeatherCard-main-bb1a17e7-dc20-421a-b1b8-c117308c6626”
After getting the id of the div element which holds the data we want, we are defining a reference to the div element with the following line:
week = soup.find(id='WxuDailyWeatherCard-main-bb1a17e7-dc20-421a-b1b8-c117308c6626')
Now we can use the variable week to reference the Daily Forecast div.
Using Inspect again, I found that the actual content within the div element is stored in a elements with a class of “Column–innerWrapper–3K14X”.

We can get access to all 5 (one for each day of the week) of these a tag items using the find_all function.
items = week.find_all(class_='Column--innerWrapper--3K14X')
Now, we can get access to the data within the items array. We will make an array of the dates within the items array using this line:
date = [item.find('h3', class_='Column--label--L3RrD').get_text() for item in items]
Using the same process as before, I found that all the dates were stored in a h3 with a class of ‘Column–label–L3RrD’. The above line creates an array of dates by running the find() method on every item within the items array.
Now, we can do this for the temperature and chance of rain data stored in the items array.
temp = [item.find(class_='Column--temp--2v_go').get_text() for item in items]

chanceOfRain = [item.find(class_='Column--precip--2H5Iw').get_text() for item in items]
Now, you can access the date, temperature, and chance of rain data with the variables we just created!
Pandas Addition
As an extra, you can put the weather data we just scraped into a simple Panda’s data frame so that it looks better.
First, install the Pandas package and import Pandas at the top of your scraper.py file.
import pandas as pd
Under the data definitions, write this line. This line creates a data frame in the variable weather_info with the data.
weather_info = pd.DataFrame({
    'Date': date,
    'Temp': temp,
    'Chance Of Rain': chanceOfRain
})
You can print the weather info to see your data outputted in a table format
print(weather_info)
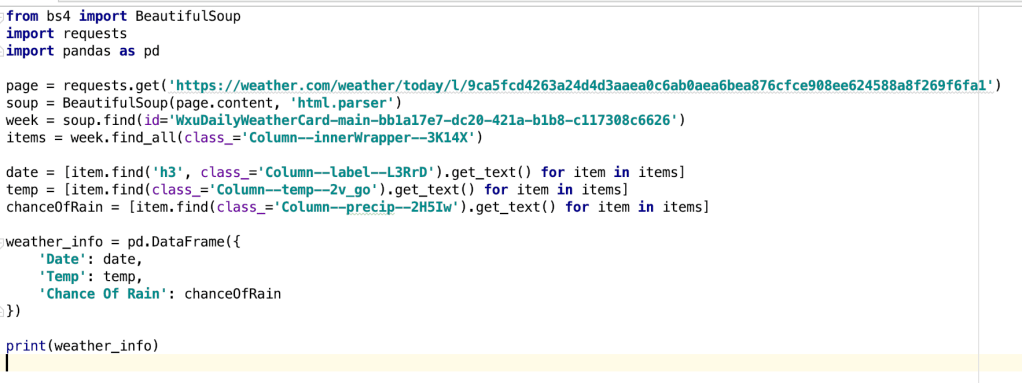
And that’s it! You’re done. Here is the full code:
Here is the expected output– a Pandas data frame. You can do some research and see how to make it look better:

