The default path to MySQL on Mac is /usr/local/mysql/bin.
If you type mysql --version, you may get an error saying “command not found.” This is because you don’t have the MySQL command in your path.
To solve this, you can do one of two things:
# This will add MySQL to your current session (will be lost when you close Terminal)
export PATH=${PATH}:/usr/local/mysql/bin
# Permanantly
echo 'export PATH="/usr/local/mysql/bin:$PATH"' >> ~/.bash_profile
Copy and paste whichever command you prefer into Terminal. Close & reopen your Terminal window after you run the command.
Now, if you type mysql --verison, it should show you your version of MySQL.
Log in and use MySQL in the Terminal using this command: mysql -u root -p. It will ask for your password; make sure you use your MySQL password, not your system password
Ctrl + L to clear the prompt
Show users:
SELECT User, Host FROM mysql.user;
Create user: When you create a new database for a new application, you will probably want to have a specific user for that database rather than using the root user
CREATE USER 'someuser'@'localhost' IDENTIFIED BY 'somepassword';
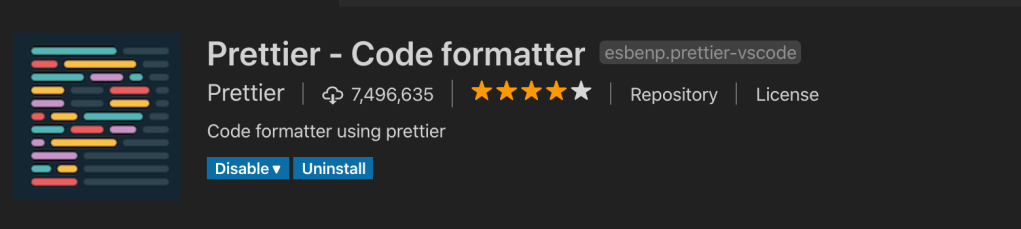
No one likes messy code, but no one likes painstakingly formatting their code as they write it either. The Prettier plugin on VS Code takes care of that for us.
To install it, navigate to the fifth panel on the VS Code sidebar
Type “Prettier” into the search bar and it should be the first option in the list
It’s installed now, but we’re not done. We have to do some set up to get Prettier working in our files.
Navigate to the Settings at the bottom left corner of the screen.
Type “format on save” into the search bar. Change this property to true. This will make it so that whenever we save a file that we’re working on, Prettier will automatically format it for us.
Type “prettier” into the search bar. You will see a list of around 20 properties that dictate the formatting rules Prettier will follow. Change these settings to your preference.
For example, you can change “prettier.singleQuote” to true if you don’t want to deal with some of your code using double quotes and other parts using single quotes.
Save your new settings, close VS Code, and you’re good to go!
To accomplish this, we will be using an npm package called dotenv.
Dotenv is a zero-dependency module that loads environment variables from a .env file into process.env
Install the dotenv package
npm i dotenv
2. Require dotenv in the server file
require('dotenv').config();
3. Create a new file in your project called .env
4. In the .env file, paste all of your API keys
API_KEY=4423b234y329324b32
5. Access the API key with process.env
const api_key = process.env.API_KEY;
6. Create a .gitignore file and add the .env file to it
The code in the .gitignore file:
.env
7. Upload to Github!
It’s recommended to include something that will help others understand what to do with .env variables whether that be using the README, .env_sample, etc.
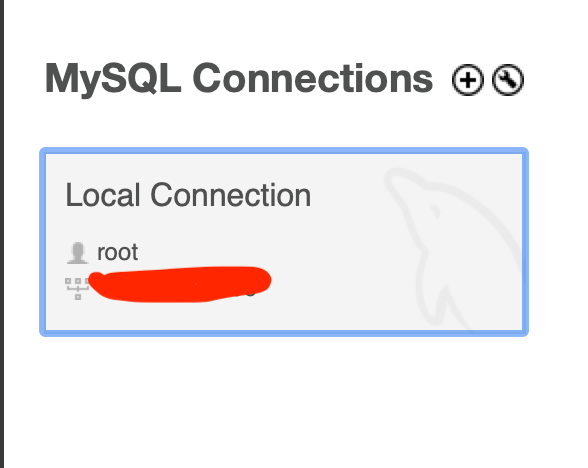
Problem: Whenever I click on my Local Connection to get access to my MySQL Database, Workbench attempts to open it then freezes.
Solution: It’s not ideal, but I have to delete the Local Instance and create a new one. It works for me after that.
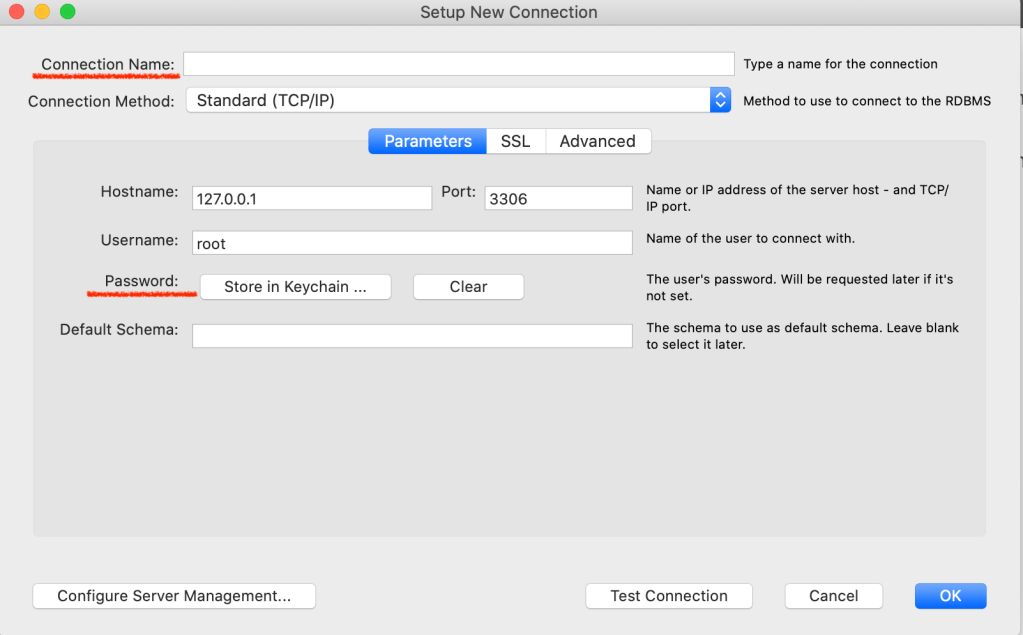
Right-click on the Local Instance and select “Delete Connection.” Then Press the “+” button next to “MySQL Connections.”
Fill in the Connection Name (any name you want) and Password (the password we created earlier during the MySQL installation). Then, test the connection using the Test Connection button at the bottom. If the connection is successful, press OK.
This tutorial assumes you have Node.js, MySQL, and MySQL Workbench installed
Create a new Node application
Create the package.json and install the necessary dependencies
cd project-folder
npm init
npm i express express-handlebars mysql
2. Create a new MySQL Database
Create a new Schema. I will call mine Practice
3. Set up your server file
Quickly set up your server file and initiate your MySQL Connection in order to make sure the connection is running successfully before we go any further.
In the server file, import the MySQL connection from the connection.js file:
const mysqlConnection = require("./connection");
5. Create a table in the database
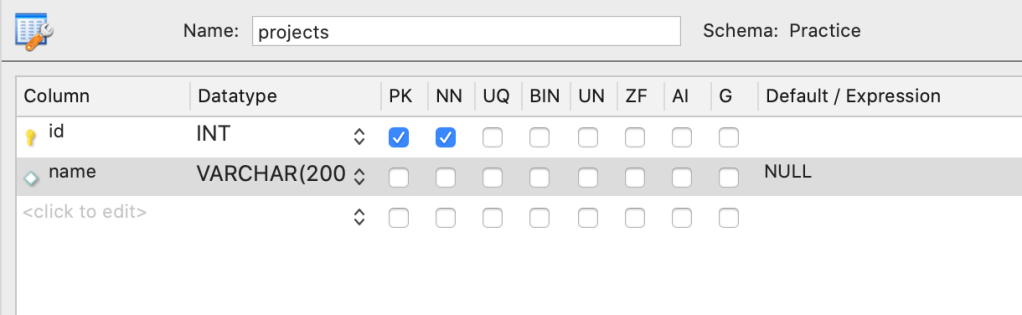
I’m going to open up my Practice Schema and find the Tables. Then, I’m going to right-click on Tables and create a new Table by clicking “Create Table.” Give your table a name and whatever properties you would like. Then, press Apply.
My projects table have properties of id and name
6. Create a route and query the database
In my server file, I’m going to handle GET requests to the root route. When a user requests the root route, I will query the MySQL database for all of the items in our projects table and send back the items in the response.
Data Mining is the application of specific algorithms for extracting patterns from data
For decades, data mining was being done with Statistics. In the 1990s, when Computer Science was getting exponentially popular, people started doing Data Mining with Computer Science.
Data Mining + Computer Science = Data Science
Data Science is an interdisciplinary field that uses scientific methods, processes, algorithms and systems to extract insights from data.
Fun fact: IBM pioneered the first relational database
There are three main career specializations within the Data Science field:
Data Engineer
Data Scientist
Machine Learning Expert
The Data Engineer comes first in the process of creating value from data. It is the Data Engineer’s job to collect and store data. Then comes the Data Scientist; it is his/her job to take this data, clean it and explore/visualize it (w/ statistics, graphs, charts, etc.). After that, the Machine Learning Expert can apply intelligent algorithms to the data in order to extract insights from it.
Data Science Workflow
Data Scientist’s take a systematic approach to answering questions with data. It usually follows this pattern:
MySQL is a relational database management system. It is one of the most popular RDMS’s out there today.
It is open-source, but it’s also backed by Oracle so you can use it without any commercial license or you can purchase premium services & support from Oracle
Installing MySQL on macOS
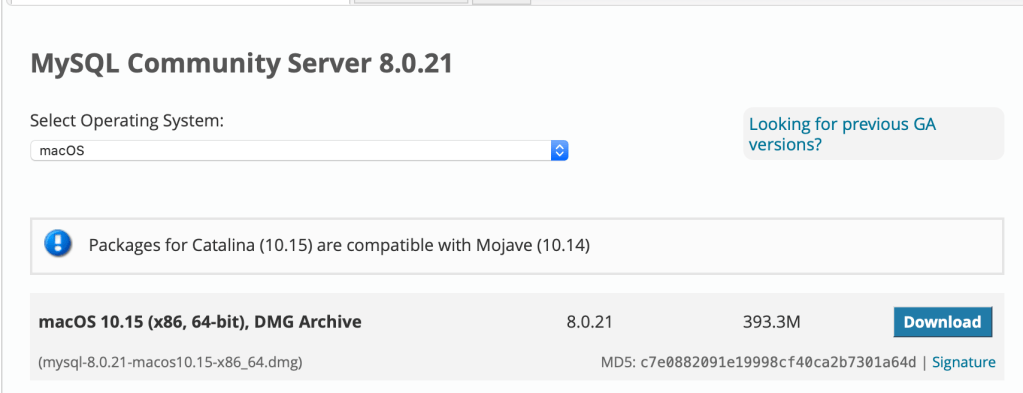
Go to this link. You should see a page with the title MySQL Community Server. Choose whichever version you want to download; you can just download the first version in the list if you’re not sure.
Open the .dmg Installer and go through the setup screens in the modal popup. When it asks for a password for your root, choose a fairly robust password and write it down somewhere because you’ll be using it in any MySQL applications.
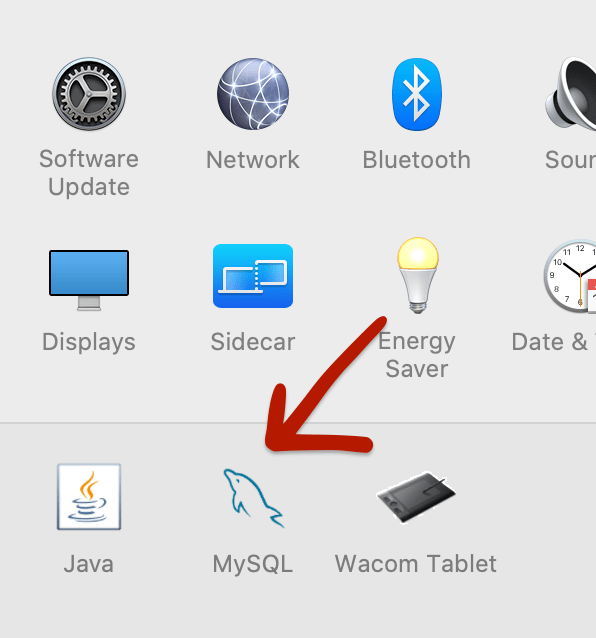
To check if the installation was successful, go to your computer’s System Preferences and if you see the MySQL icon in one of the rows, your installation was successful.
Double click the MySQL icon to open a modal window in which you can start or stop your MySQL Server.
Installing MySQL Workbench
MySQL Workbench is a GUI tool that lets you manage your MySQL databases much more simply.
Go to this link and select MySQL Workbench from the list of Community Downloads.
There will only be one Installer option so press Download, then choose “No thanks, just start my download” and the download will start.
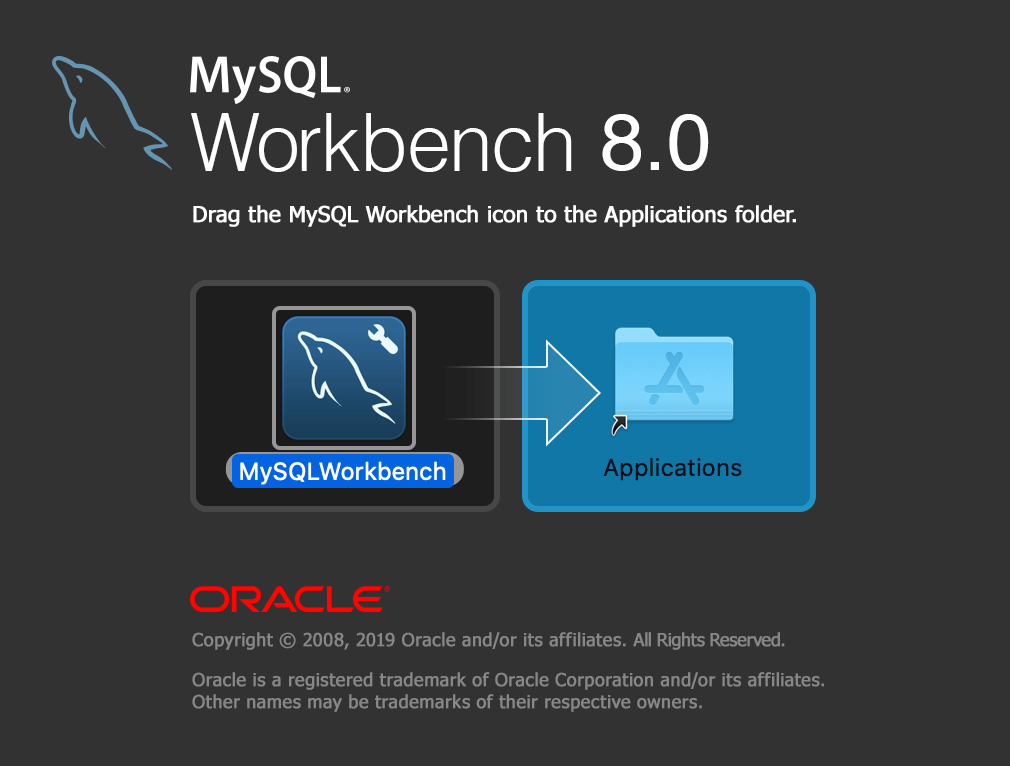
Open the .dmg Installer and drag MySQL workbench into the Applications folder. That’s it, you’ve set it up!
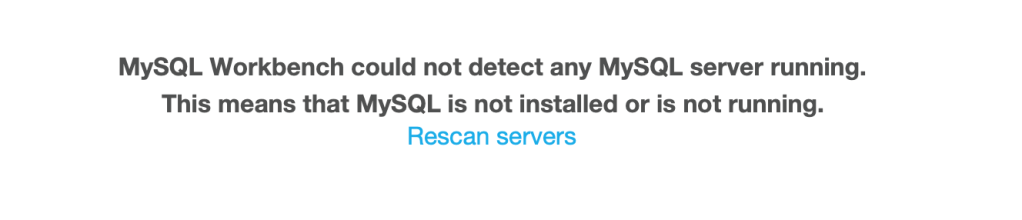
When you open MySQL Workbench, you may see this message (“MySQL Workbench could not detect any MySQL server running. This means that MySQL is not installed or is not running”).
Since we know we installed MySQL earlier, this unwanted message is displaying because MySQL server is not running on our computer.
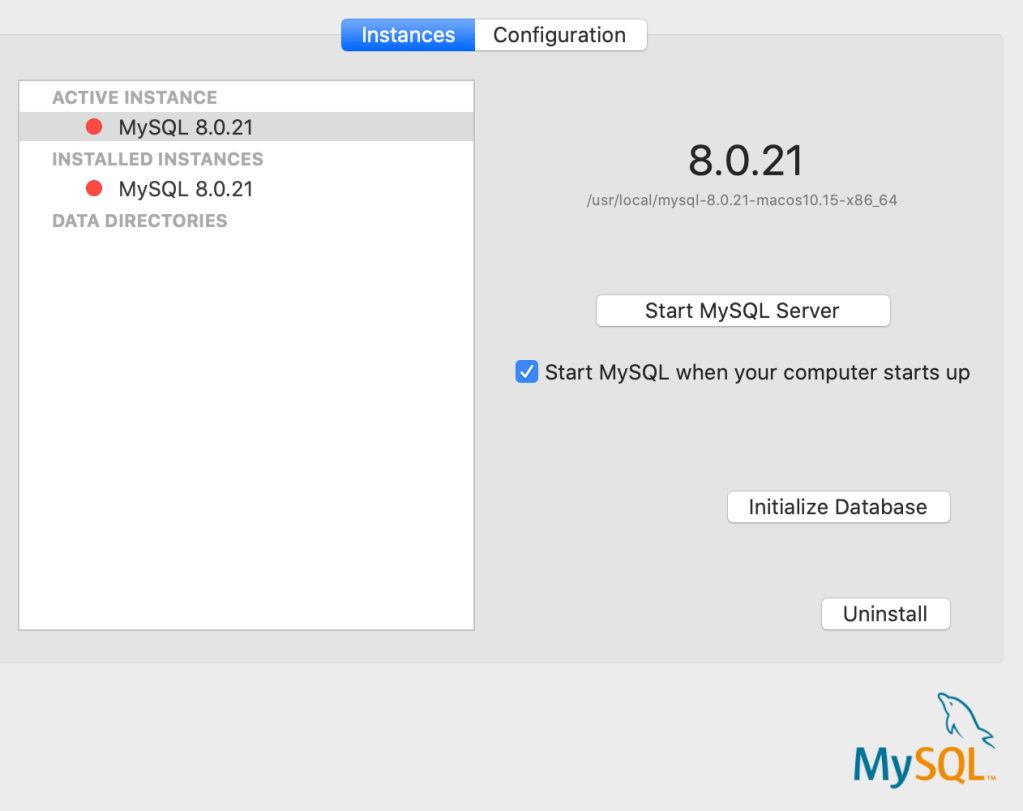
To start the server on your computer, go to your computer’s System Preferences, double click the MySQL icon, and you should see this page.
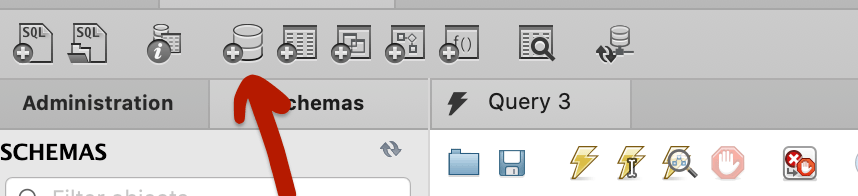
Press “Start MySQL Server” to start your server. Close MySQL Workbench and reopen the application. Now, you should see:
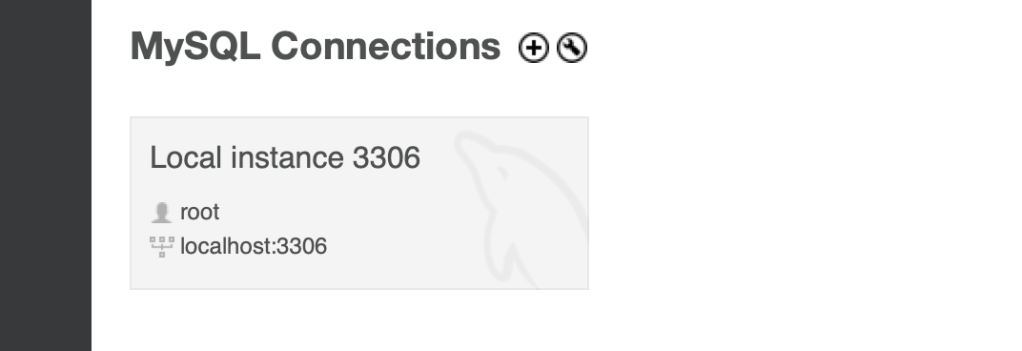
This is what we want to see. Press on this button. *If you press it and you get an error, delete the connection and create a new one.
How to Create a New Connection
Press the “+” button.
Fill in the Connection Name (any name you want) and Password (the password we created earlier during the MySQL installation). Then, test the connection using the Test Connection button at the bottom. If the connection is successful, press OK.
When you press on the Local Connection now, it should work.
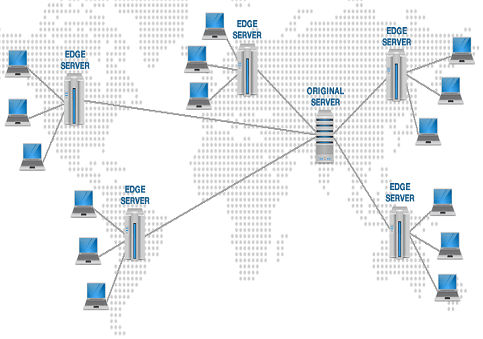
A Content Delivery Network (CDN) is a system of geographically distributed servers that accelerates internet content delivery speeds.
Websites are hosted on servers. Servers are located in specific physical locations. If a user is in a location that is far from the server, they will experience load times that are longer than that of a user that is near the server. CDNs help to remedy this geographic speed inconsistency.
The CDN consists of 2 components: the origin server and the cache server(s). The origin server is, as the name suggests, the original server onto which the website was deployed. The cache servers, or edge servers, are servers around the world on which the original server’s content is duplicated.
So how does a CDN work? When a user makes a request to a website that is hosted on a server across the world, the user will receive that website’s pages from the closest cache server instead of having to wait for the long trip to the origin server.
CDNs are most effective in speeding the delivery of content from high traffic websites with global reach. For example, YouTube has its own CDN which makes it fast for everyone all over the world. Netflix uses an algorithm to push its most viewed shows across its CDN; that’s why more popular shows load faster on the platform.