This tutorial assumes you have Node.js, MySQL, and MySQL Workbench installed
- Create a new Node application
Create the package.json and install the necessary dependencies
cd project-folder
npm init
npm i express express-handlebars mysql
2. Create a new MySQL Database
Create a new Schema. I will call mine Practice
3. Set up your server file
Quickly set up your server file and initiate your MySQL Connection in order to make sure the connection is running successfully before we go any further.
const express = require("express");
const mysql = require("mysql");

const app = express();

app.use(express.urlencoded({ extended: false }));
app.use(express.json({ extended: true }));

const mysqlConnection = mysql.createConnection({
    host: "localhost",
    user: "root",
    password: "password",
    database: "Practice",
    multipleStatements: true
})

mysqlConnection.connect((err) => {
    if (!err) {
        console.log("Connection Successful");
    } else {
        console.log("Connection Failed");
        console.log(err.message);
    }
})

app.listen(3000);
Run your Node app
node index.js OR nodemon index.jsIf your Terminal logs “Connection Successful”, move to Step 4
4. Move MySQL Connection to separate file
This is not required; it’s simply for organization’s sake
At the same level as the server file, make a new file. I’ll call mine connection.js
This will be the contents of the file:
const mysql = require("mysql");

const mysqlConnection = mysql.createConnection({
   host: "localhost",
   user: "root",
   password: "josh-mysql",
   database: "Practice",
   multipleStatements: true
});

mysqlConnection.connect((err) => {
   if (!err) {
      console.log("Connection Successful");
   } else {
      console.log(err.message);
   }
});

module.exports = mysqlConnection;
In the server file, import the MySQL connection from the connection.js file:
const mysqlConnection = require("./connection");5. Create a table in the database
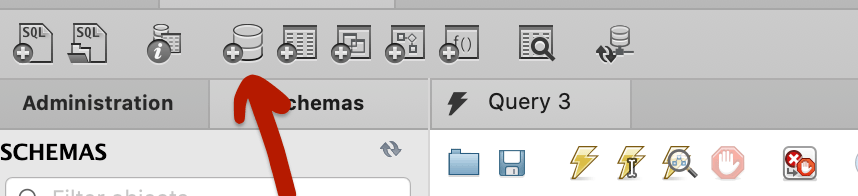
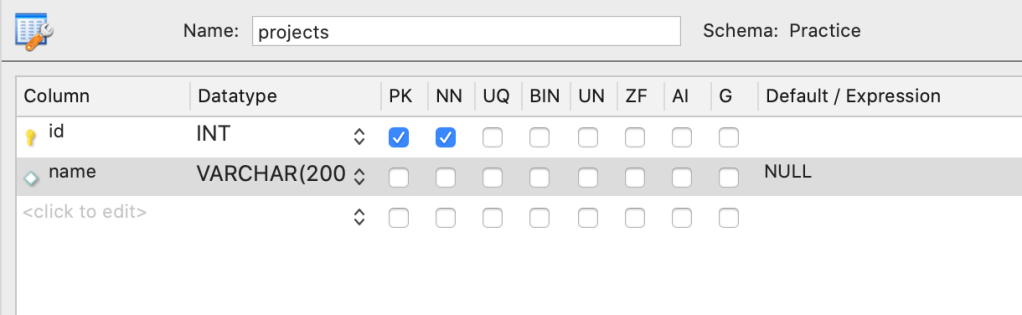
I’m going to open up my Practice Schema and find the Tables. Then, I’m going to right-click on Tables and create a new Table by clicking “Create Table.” Give your table a name and whatever properties you would like. Then, press Apply.
6. Create a route and query the database
In my server file, I’m going to handle GET requests to the root route. When a user requests the root route, I will query the MySQL database for all of the items in our projects table and send back the items in the response.
app.get("/", function(req, res){
   mysqlConnection.query("SELECT * from projects", (err, rows, fields) => {
      if (!err) {
          res.send(rows);
      } else {
         console.log(err);
      }
   })
});
Let’s test out our route. Run your server with node index.js, open up Postman and send a GET request to the root route.

Since we haven’t created any records into our projects table, this request should return an empty array.
That’s it! You’ve set up a basic Node server with a MySQL database.
